Monday, August 1, 2011

A Bit Biased


Bias binding is great for bunting banners, finishing hems/edges on clothing, and of course, for binding quilts. Continuous bias is fast and easy to make and doesn't waste any fabric. Here's what you need to know to make your own binding.

You're going to need a rotary cutter, scissors, a pencil, a clear ruler (or two), a bias maker if you're planning to make double fold bias (I'm using a Clover 25mm bias maker), an iron, and a sewing machine.


There are formulas available on the internet on how to calculate the size square you need to cut based on the total yardage of bias you need, but I never had much luck with them. I just estimate and hope for the best...

Start by cutting a square of fabric (mine is 22" square). Make sure the right side of the fabric is facing up. Next, cut the on the diagonal (the bias).


Flip the right triangle over and place it on top of the left triangle so that right sides are facing.
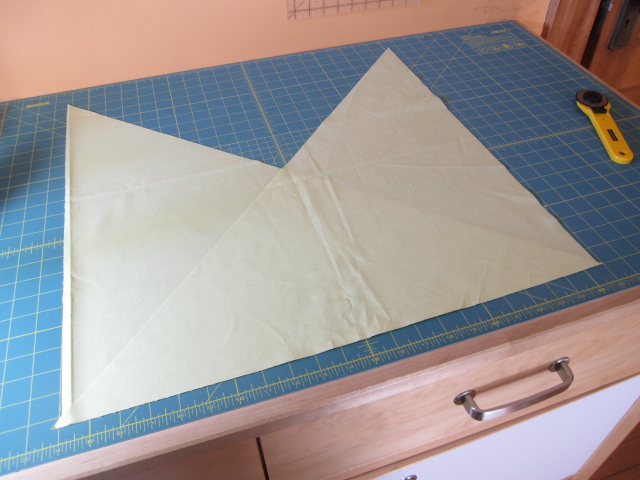

Offset the two triangles 1/4" so that the pointy ends stick out (adjusted for seam allowance).


Pin the edge and sew a 1/4" seam.


Press seam open.


Lay the piece out so that the wrong side is facing up like this:


Double check that the bias is running up and down by pulling on the top and bottom edges. It should stretch easily.

Next, draw a line 1/4" away from the top and bottom edges using your fabric pencil and clear ruler. This is the seam allowance for making the tube. By marking it now, matching up the cutting lines later will be much easier.

I need my bias strips to be 1 7/8" wide to make my 25mm double fold bias. I will now draw as many lines as possible 1 7/8" apart starting at the top seam allowance line and stopping at the bottom seam allowance. If you're making quilt bias, you'll want to make your strips 2 1/2" wide or more or less, depending upon your preference. I personally prefer 2 1/4" wide. If you're making bias binding for garments, refer to your pattern or use the width guidelines that accompanied your bias maker.


Once you've drawn all the lines you can, trim off any excess fabric that's not wide enough to make the bias strip using your ruler and rotary cutter. I just have a small amount of excess on mine.

 
Flip the piece over so that the right side is facing up, then fold over the top and bottom edges to form a tube. Instead of lining up the cut lines perfectly, offset by one like this:


Now you will pin the seam to make the tube. Stick a pin the second "intersection" (the point were the vertical and horizontal lines meet) from the left.


 Then fold the fabric over to make sure that your pin goes through the intersection on the other side.

Continue this method until every intersection has been matched up and pinned. If your intersections don't line up (like mine didn't - aaargh!), you'll need to go back and remeasure and redraw your cut lines.


Now sew a seam along the line you drew across the top edge, pulling out the pins as you go.


Press the seam open. I slide my tube onto a sleeve ironing board, which works like a charm.


Slip your left arm through the tube (assuming you're right handed). Start cutting along the cut lines. Get comfortable as this may take awhile depending on how much fabric you're working with.


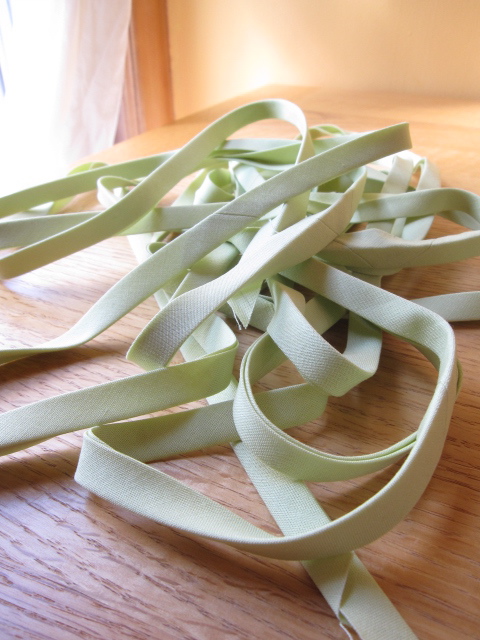
My 22" square just turned into 20 feet of 1 7/8" wide bias!

Clip off the little triangle tag (seam allowance) on each end.

If you're making quilt binding, you simply fold the bias strip in half, wrong sides facing, and press. If you're making double fold bias, keep reading.

Head over to your ironing board with your long strip, a pin, and your bias maker. With the wrong side facing up, thread the angled edge into the bias maker. Use a pin to push it through.


Once you've fed some fabric through, grab it with your dominate hand and pull out about 4-6" and then start pressing with your iron. I slowly pull on the handle of the bias maker with my left and keep pressing with my right.


This process gets a little thorny when you get to the seams. Put your iron down and use a pin or your fingers to get the seams through the maker.  Make sure the seams stay open, then press.

Continue until the entire length of bias is pressed.

To finish, fold the bias in half and press again.


Congratulations, you're done!


P.S. My very wise sister-in-law would like to suggest that the easiest way to making bias binding is to grab your car keys and your purse and drive to the nearest fabric/craft store and buy some ;)

Saturday, July 9, 2011

Field Trip!!

Today I'm taking you on a virtual field trip to the International Quilt Study Center and Museum in Lincoln, Nebraska.

Disclaimer: my museum companion was a very wound up I'm-not-going-to-take-a-nap-because-we're-on-a-vacation 2 year old. Normally my daughter is sweet as pie, but the day of our visit she was a handful! As a result, I only took a few photos and cut my trip short for fear of toddler gone wild.
One shushes while the other one yells

Now where was I?  Oh, yeah...

Quilts of Valor were on display in the light filled atrium, along with all of these nifty sewing treasures from the past.


Antique toy sewing machines

On the main floor, tucked in a little corner was Virtual Gallery filled with computers featuring interactive tours of the museum's collection. A projector also displays quilts from their collection onto a screen, bringing their beauty to life.

The highlight of the museum for me was the Nebraska Quilts & Quiltmakers exhibit (click on the link to see the full exhibit). I just noticed this show was curated by a friend's sister. Small world!

The applique quilts really blew me away, especially the red and green ones. The designs still look fresh so many years later. And oh, the amount of hand sewing involved. Mind blowing!


And what is it about simple red and white? It's just so appealing!


Here are few more of the quilts that were hanging up on the third floor (not in the main gallery):


And what do you think of this pineapple quilt? Amazing! I've decided I absolutely must make a pineapple quilt this year because they are so cool.


The show in the other main gallery is Elegant Geometry: American and British Mosaic Patchwork. I didn't get a chance to take photos of these because my dear sweet daughter was absolutely wild. But do check it out online if you're a hexie fan.

Happy sewing,
Annik

Wednesday, June 29, 2011

W.I.P. Wednesday (Variation)

My work in progress this week is top secret. Sorry.


This is all I'm sharing for now. I've been machine quilting this baby for what feels like months (although it's really only been about 2 weeks). Despite swearing that I would never stitch in the ditch again, I decided to SITD the whole damn thing. I always say, if there's a harder way to do something, do it!

The real W.I.P. this week stands for What I Purchased. After a long week of trying to convince my children that they actually *love* camp, I needed some retail therapy. Last Friday I headed over to my local (20 miles away) sewing machine dealer and picked up some goodies for my Viking sewing machine. $60 later, I'm the proud owner of a (used) straight stitch plate, an open toe stippling foot, and a thread stand.

Straight stitch plate & an open toe stippling foot
Thread stand for cones
In reality, I would love a new sewing machine made for quilting. The Juki TL-2010Q is my dream machine! So why do I keep investing in accessories for the machine I have instead of saving up for a new one? Dunno.


What's your dream sewing machine? Do you own it already or is it still in the wish phase?

Happy sewing,
Annik

Sunday, June 26, 2011

Sunday Stash #3

Ah, green.


Left to right - Kaufman's Quilter's Linen, Erin Michael's Lush for Moda, and 1974 by Urban Chiks for Moda
I picked up these little lovelies at Digs in Northfield, Minnesota this past week. The store is a treasure trove of OOP fabrics, at least for now. They're moving out old inventory before they move their store to Minneapolis in July. The new location is a mere 1.5 blocks from my house! Fabric within walking distance - you have no idea how long I've been dreaming of this.

Here's some red, white, and blue in honor of the rapidly approaching 4th of July holiday.


Top print is from Wee Play, all the others are from Recess by American Jane for Moda
These are all American Jane prints, long out of print (yes, I'm obsessed!!!). Some I already had in my stash, others I picked up this week at Digs.  I'm planning to make a flag bunting or two with these this week. Fourth of July decorations, anyone?

Happy sewing,
Annik

Friday, June 24, 2011

Simple and Satisfying

I finished this today -


Okay, wait, here's a bigger view complete with loads of clover-


Hats off to Minick & Simpson for their beautiful Charlevoix line for Moda and of course, my beloved Sandy Klop for her super versatile pindots.

Don't you think this quilt is a slice of Americana? It makes me want to sip lemonade and talk about the good old days (whenever they were).

Here's the back - I love this print. It reminds me of my childhood, although I'm not sure why. Those little flowers seem really familiar.


Mapping out the straight line quilting was a bit slow and required lots of painter's tape but was totally worth the effort (in my humble opinion).

It occurred to me this evening that I've made this quilt before, albeit a much smaller version, right down to the red with white polka dot border. Odd.


So, at the risk of being repetitive, I'm planning to make another one with Sherbet Pips. Will I add a red with white dots border? Perhaps!

Want to make your own Americana throw? You'll need eighty-eight (88) 5" charm squares (11 rows of 8 squares). Cut 4 WOF and .5 WOF x 1.25" wide strips for the narrow border (finished size is .75" wide). Cut 5 WOF x 5" strips for the outer border (finished size is 4.5" wide).  I like  2.25" wide binding strips, but use whatever size you prefer.

I still owe you a post about the International Quilt Study Center and Museum, but that will have to be tomorrow because I'm pooped out after a long week of wrangling kids.

Happy sewing,
-Annik