

You're going to need a rotary cutter, scissors, a pencil, a clear ruler (or two), a bias maker if you're planning to make double fold bias (I'm using a Clover 25mm bias maker), an iron, and a sewing machine.

There are formulas available on the internet on how to calculate the size square you need to cut based on the total yardage of bias you need, but I never had much luck with them. I just estimate and hope for the best...
Start by cutting a square of fabric (mine is 22" square). Make sure the right side of the fabric is facing up. Next, cut the on the diagonal (the bias).

Flip the right triangle over and place it on top of the left triangle so that right sides are facing.
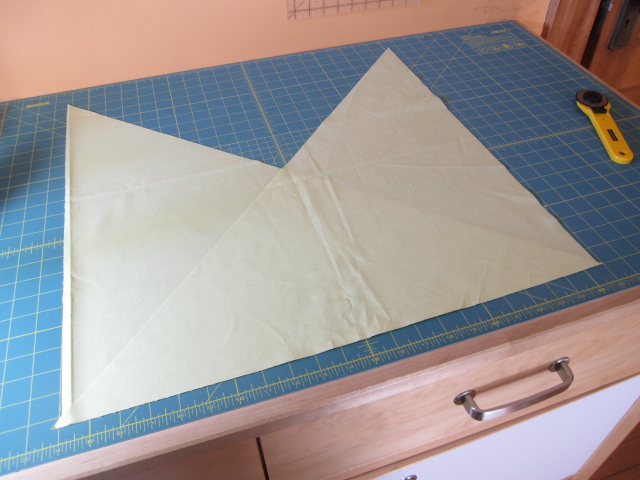

Pin the edge and sew a 1/4" seam.


Lay the piece out so that the wrong side is facing up like this:

Next, draw a line 1/4" away from the top and bottom edges using your fabric pencil and clear ruler. This is the seam allowance for making the tube. By marking it now, matching up the cutting lines later will be much easier.


Flip the piece over so that the right side is facing up, then fold over the top and bottom edges to form a tube. Instead of lining up the cut lines perfectly, offset by one like this:

Now you will pin the seam to make the tube. Stick a pin the second "intersection" (the point were the vertical and horizontal lines meet) from the left.

Continue this method until every intersection has been matched up and pinned. If your intersections don't line up (like mine didn't - aaargh!), you'll need to go back and remeasure and redraw your cut lines.


Press the seam open. I slide my tube onto a sleeve ironing board, which works like a charm.


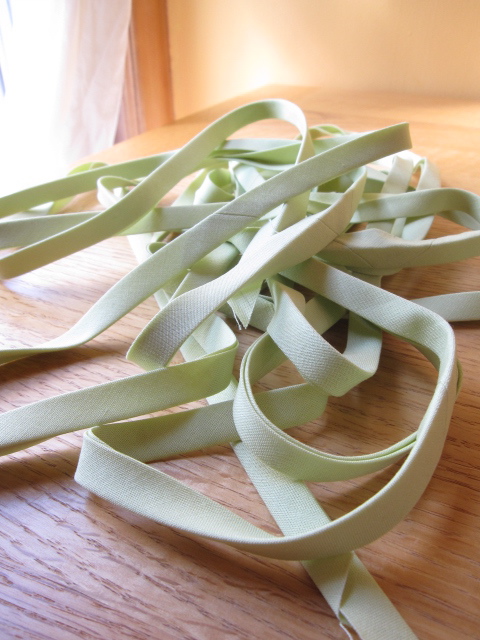
My 22" square just turned into 20 feet of 1 7/8" wide bias!
Clip off the little triangle tag (seam allowance) on each end.
If you're making quilt binding, you simply fold the bias strip in half, wrong sides facing, and press. If you're making double fold bias, keep reading.
Head over to your ironing board with your long strip, a pin, and your bias maker. With the wrong side facing up, thread the angled edge into the bias maker. Use a pin to push it through.


Continue until the entire length of bias is pressed.
To finish, fold the bias in half and press again.

Congratulations, you're done!
Thanks for the tute! I like that last line about your very wise sister-in-law! I have a SIL with the same sentiments :-).
ReplyDeleteI sent you and email but it bounced back. This is the email: I awarded you the Versatile Blogger Award. If you feel like "playing" along, plese do, otherwise, you can just ignore it, no harm done.
Here's how it works: Thank the person who gave the award to you and link back to them.
Be sure to pass the award along to some newly-discovered blogging pals whom you think are versatile.
and tell us seven things about yourself that we may not know in a post.
I love your blog - hard to believe you are "new" at quilting!