Ready for the final post in the
Four's a Charm series? We're so close to having a finished quilt I can taste it!
When we left off in the
last post, we had just finished attaching the binding to the baby quilt. Now we're going to get out a needle and thread and start hand sewing the binding to the back of the quilt. Please note that this tutorial is the method I use for hand sewing the binding, but it is by no means the only method, nor is it necessarily the fastest. I love the results, though.
Getting Started
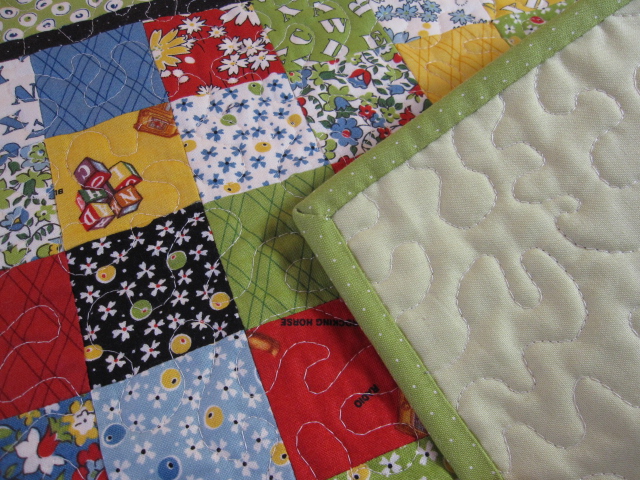
The very first thing we're going to do before we start hand sewing is iron the binding down flat. With the quilt facing right side up, fold the binding up and away from the quilt and press it flat. Use the tip of your iron to get into the seam to make sure the binding is completely pressed outward.
Stop pressing about 1.5" to 2" from the mitered corners.
Now we're ready to start hand sewing. Here's what we're going to need to hand sew our binding - scissors, cotton thread, and a needle.
Select a thread that matches the color of the quilt binding. I'm just going to use the same gray Aurifil thread I used to do the machine quilting because it will blend in pretty well with my multicolored binding fabric.
Thread your needle with a nice long strand of thread. I tend to make mine ridiculously long because I hate having to stop a bunch of times and knot off, re-thread, and start again. The down side to a very long thread strand is that it tends to knot and twist the longer you sew. Keep this in mind and choose the lesser of two evils. By the way, I've heard that using hand sewing cotton quilting thread helps prevent the twisting/knotting phenomenon, although I've never tried it myself.
Once your needle is threaded, pull one strand longer than the other. Do not knot the thread.
Tie On and Start Stitching
Pick a spot somewhere on the
back side of your quilt - preferably near the center of any side - to start sewing (avoid starting really close to a mitered corner).
Insert the needle into the fabric just below the machine stitching (where you attached your binding to the front side of the quilt). Pull the needle through until you have a small tail of a single strand of thread about 4" long. Bring the needle back into the spot where you started. Pull it through again until you've made a loop with the thread. Bring your needle through the loop several times and pull tight to make a knot. Okay, now we're ready to sew!
For some unknown reason, I didn't take photos of this step. Ugh! However, if you need a visual aid, check out the section below where I show you how to start a new strand of thread.
Don't worry about the thread tail - we'll deal with that at the very end.
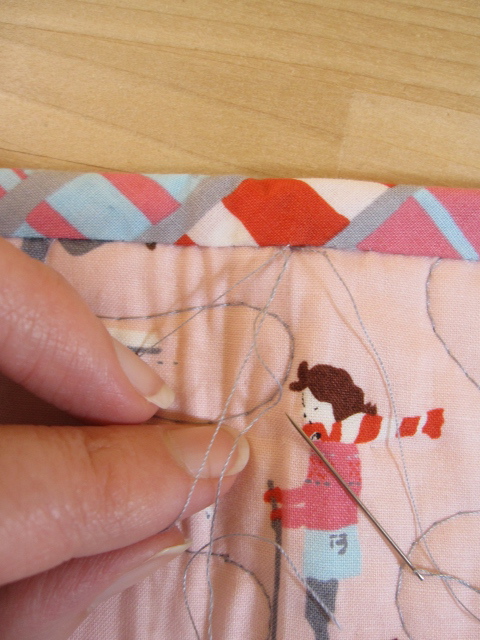
Use your hands to fold over the binding so that folded edge of the binding sits below the machine stitching. Insert the needle into the fold directly above the point where you just made the knot.
Bring the needle out about 1/4" (or less) from where you inserted it into the binding. Pull the thread through. Insert the needle into the quilt sandwich at exactly the point where you exited the binding. You want your needle to go through the quilt backing and a bit of the batting, but not all the way through to the quilt top. Use the machine stitching as your guide - always insert your needle below that stitch line.
Make your stitch about 1/4" long. Pull the thread tight.
Tip: Use your non-dominant hand to keep the thread taut as you pull the needle through the fabric. This will help prevent annoying knots and tangles.
Insert the needle into the binding fold again, just above where you just pulled the needle out of the quilt sandwich. Repeat the steps above and continue until you get to a mitered corner.
FYI, what we're doing is called a ladder stitch, and while it takes a bit longer to sew the binding this way, the stitching is nearly invisible. A perfectionist's dream!
The Mitered Corners
Ready to sew a mitered corner? It sounds far worse than it really is.
Keep sewing according to the directions above until you get to the corner.
Flatten the mitered corner out with your hand, then fold it down.
 |
| wow, do I ever need a manicure! |
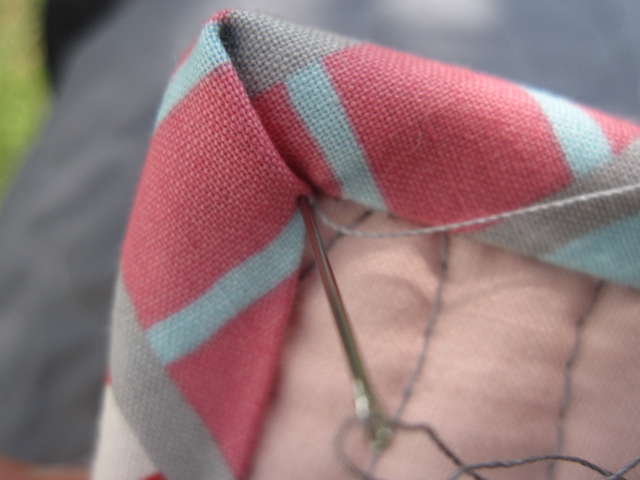
Insert your needle into the point where the two sides meet and take the needle through to the front of the quilt, making sure that the needle enters the front at the corner of the miter.
Whip stitch up to the top of the miter.
Bring the needle back through to the back of the miter when you get to the top, then whip stitch back down on the other side.
Now continue with the ladder binding method again, starting as close to the corner as possible.
That wasn't so bad, right?
Knotting Off
Sadly, there's no way you'll have enough thread on your needle to make it all the way around the quilt. You'll have to stop and start again at least once. You usually know when it's time to knot off and start again when find your needle keeps coming unthreaded.
Here's how to stop and start again:
Sew a stitch in the binding fold, then put your needle into the quilt sandwich below.
Make just a very small stitch, then loop back around into the same stitch to make a circle with your thread. Bring the needle through the loop a couple of times and pull it tight to make a knot.
Pull the needle off the thread. Leave the tail for later.
Thread your needle again, and just like when we started, do not tie a knot in the thread. Bring the needle into the quilt sandwich just below the machine stitching line right next to the knot you just made. Leave a 4" tail, then bring your needle into the sandwich at the same spot again and bring it almost all the way through until you've create a medium sized loop. Bring the needle through the thread several times then pull tight to make a knot.
 |
| I've made a loop (in my left hand) and now I'm going to bring the needle through it several times to create a knot. |
Continue hand sewing the binding until you've made it all the way around the quilt, then knot off your thread using the same method as above.
Bury the Thread Tails
Our last step is to bury the thread tails we've left along the way.
While it's probably overkill, I like to take each pair of thread tails and double knot them.
To bury the threads, start by hold a pair of threads at the same time and give them a clean snip with your scissors so that they are both the same length.
Thread both ends through the eye of your needle. If you can't get both into the eye, simply do one thread at a time.
Bring the needle in through the binding, pushing it in an inch or two, then bring the needle back out in a discreet location (like just under the fold of the binding). Snip the threads with scissors. Viola! Your threads are buried :)
 |
| Bring the threads into the binding directly above the knot, then bring the needle out about 1" to 2" away from the point of entry. |
 |
| Pulling the threads through |
 |
| Snip the remaining thread tails and you're done. |
Repeat these steps with the remaining thread pairs.
Congratulations! Your quilt is finished!! Thanks for following along the Four's a Charm series :)
-Annik
P.S. Make sure you wash it and dry it before you put a baby on or under the quilt since the unwashed fabrics contain chemicals that may irritate a baby's skin.