Showing posts with label tutorial. Show all posts

Friday, October 5, 2012

Little Treasures Drawstring Pouch

Like so many people, I'm just loving chevrons right now and I had to make something with Riley Blake Designs' small rainbow print. Why not a little drawstring bag? They're perfect for tiny toys, cosmetics, and so much more. Want to make one, too? All you need is a little ribbon and two fat quarters (I've got a couple of DIY kits here if you want to make one just like mine). Here's the tutorial.


Little Treasures Drawstring Pouch

What you'll need:
- 2 fat quarters that look good together
- 1" wide blue painters' tape
- a fabric marker (disappearing ink or chalk)
- clear acrylic ruler, rotary cutter, and mat
- approximately 52" of 5/8" (15mm) twill tape or grosgrain ribbon (this is enough for 1 bag)
- a safety pin
- all the stuff you need for basic sewing

About this pattern:
- All seam allowances are 1/2"
- Backstitch the beginning and end of every seam
- Trim your threads as you go

Cut the two fat quarter in half lengthwise (against the grain), giving you four pieces that are approximately 9" high by 21" wide. You've got enough fabric to make two drawstring pouches. Stash away the two extra pieces for another day/project if you don't want to make two.


Layer one outside print and one inside print together and trim them up so they are exactly the same size.

Place a piece of 1" blue painters tape 2 1/2" inches from the top and bottom of the outer fabric. The tape should have over the edges a bit.


Fold the fabric in half, right sides facing, making sure the tape pieces line up. Pin the fabric layers together.


Now find your lining piece. Fold it in half and pin it. 

Find your ruler and fabric marker. We're going to box the corners of the outer and inner bags. Line the ruler up along the bottom left side of the outer bag (wrong side of the fabric should still be facing out). Measure 1" from the bottom edge and 1 1/2" from the left side. Draw a line on the top and right side of the ruler, creating a rectangle. Repeat on the right side of the bag - line the ruler up 1" from the bottom and 1 1/2" from the right side and mark the rectangle.


Now do the exact same thing with the inner bag.


Using the lines as your guides, cut out the four rectangles you just marked.


Now we're ready to sew. Let's start with the outer bag. Sew the right and left sides of the bag, stopping when you reach the tape. Carefully backstitch/reinforce at the points next to the tape, then start sewing again on the other side of the tape, reinforcing the seam. This will leave you with a 1" opening 2 1/2" from the top edge of the bag, which we will later make into the channel for the ribbon drawstrings.


TIP: use a fabric marker on the wrong side of the fabric to mark the tape line so you know where to stop sewing and where to start sewing again.

Turn the outside bag inside out. Carefully pull the tape out of the openings.


Grab a pair of (non-sewing) scissors and cut the tape about 1/2" from the opening. Do not remove the tape because you'll need it in place later on.


Now I'm going to tack the seams down along the openings on either side. This is an optional step. Start by finger pressing the seam open.


Next, make a straight stitch along the seam just along the opening.
 

Repeat on the other side of the seam and then on the other side of the bag.


Now sew the side seams of the liner bag. Once again using a 1/2" seam allowance, sew one side completely, then sew the other side, leaving a gap of about 2" - 2 1/2"  close to the bottom of the bag. You'll need this opening to turn your bag right side out, so don't forget!

Reinforce seams at opening

Time to box the corners. Start on one side of the lining bag. Grab the two corners of one of the rectangles you cut and pull them out until the two fabric edges line up.


 Open the side seam with your fingers and pin the seam allowances down flat.


Now sew a 1/2" seam across the edge you just created.


Pin and sew the other box corner on the liner bag, then do the same thing for the outer bag.


Zip over to the ironing board and press the side seams open on both the inner and outer bags. A sleeve ironing board is really handy for this if you have one.


Turn one of the bags right side out (it doesn't matter which). Place it inside the bag that is still inside out. Line up the side seams and pin them together. Make sure the top edges of the two bags line up and place a few pins.


Sew the two bags together along the top edge. Does your sewing machine have a free arm? If yes, here's your chance to use it!


Once you've sewn all the way around, reinforced your stitches, and trimmed your threads, turn the pouch right side out using the hole along the seam in the liner bag. Tuck the liner bag into the outer bag. Pay special attention to the points of the boxed corners.

Crazy turning out action shot!


Head back to the ironing board and press the top edge where the inner and outer bags have been sewn together.

It's not a bad idea to press the body of the bag while you're at it. It gets a bit wrinkly during the turning process.

A crisp top edge.

Topstitch the top edge if you care. I'm not bothering.

Head back to the sewing machine. We're going to sew the channel for the ribbon drawstrings now. I've changed my bobbin thread to match the liner fabric. You may want to do the same if your liner bag is a drastically different color from the outer bag.


Sew a seam along the two sides of the tape, all the way around the pouch.


Remove the tape. Now your pouch looks like this:


Find your ribbon or twill tape and the safety pin. Place the pin through the end of the ribbon and start feeding it through the channel. It doesn't matter which side you start on. Feed it all the way around until you come back out the hole where you started.


Line the ribbons up and make a clean cut. The ribbon tails should hang out about 3" to 3 1/2" beyond the opening.


Knot the two ends together. You may need to hem the ends of your ribbon or twill tape if it frays easily.

Repeat the ribbon stringing process starting on the other side of the pouch, bringing the ribbon all the way around the bag. Trim the ribbons so they are approximately the same length as the ribbons on the other side and knot them together.


Ready for the last step? Turn the pouch wrong side out and hand sew or machine sew the turning hole closed.


Turn the bag right side out again and give those drawstrings a yank. Cute!


-Annik


Saturday, September 29, 2012

The Sale Continues

In my last post I mentioned I'm having a sale. Well, I decided to extend it a bit and dump the coupon code. Go check out my Etsy shop to find some amazing deals on Riley Blake Designs fabrics. The ever-popular chevrons are a mere $7.65. The retail price is $10/yd, people. This is a totally great deal :) But you must hurry because Sunday, September 30th is the last day of the sale.

1/2 Yard Chevron Bundle - only $38.25!

I've been busy lately working on a drawstring pouch tutorial. I was inspired by Anne Weil's project in the latest edition of Petite Purls magazine. Anne has so many amazing tutorials on her blog - especially for kids! I was hoping to have my project up already, but man, it takes forever (for me) to write a good tute and take all the photos. It's just inches away from being done, though, I swear, so stay tuned. In the meantime, would you like a sneak peak??


Enjoy these last few days of glorious September!

-Annik

Monday, April 16, 2012

Four's a Charm - let's bind the quilt

Woohoo! We're almost done with our Four's a Charm baby quilt! In this installment we're going to cover making binding and sewing it on to the quilt. Hand sewing the binding will be the last installment (coming soon).


Our first task is to trim off the excess batting and backing around the quilt top. Use a rotary cutter and long ruler, as I'm doing here in this photo, or trim down the quilt the old fashioned way with a pair of scissors.


Once you've trimmed the quilt on all four sides, it should look like this:


Cutting and Joining the Binding Strips
Time to make our binding (yardage is listed in the first post of this series).

You have two options when it comes to cutting binding strips. The first option is to cut your binding strips along the width of the fabric (WOF). This is very simple and fast and is the method I typically use. The second method is to cut your binding along the bias. I opted to cut my binding on the bias because I love the way it looks with the stripey scarf print from the Sherbet Pips collection. If you're interested in this method, here's a link to my continuous bias tutorial. If not, read on.

For the WOF strip method, the first thing you need to do is determine the number of strips to cut. Our trimmed quilt is 40" square. 40" x 4 sides = 160" plus we need extra length for seam allowance and for making our mitered corners. Measure the width of your binding fabric, not including the selvedges. If it's less than 43", you'll need to cut 5 WOF strips (or 4 and 1/2). If it's more than 43" wide you can get away with only 4 strips.

To make WOF binding, use your rotary blade a long ruler to cut four or five WOF x 2.5" strips. I personally prefer to cut my binding strips to 2.25", but if you've never bound a quilt before I suggest you use the wider measurement.

Cut the selvedges off of both ends of all of the binding strips.

Place one strip right side up in a horizontal position.

This is some espresso brown binding I've already cut for another quilt. I won't be using this on my Four's a Charm quilt!

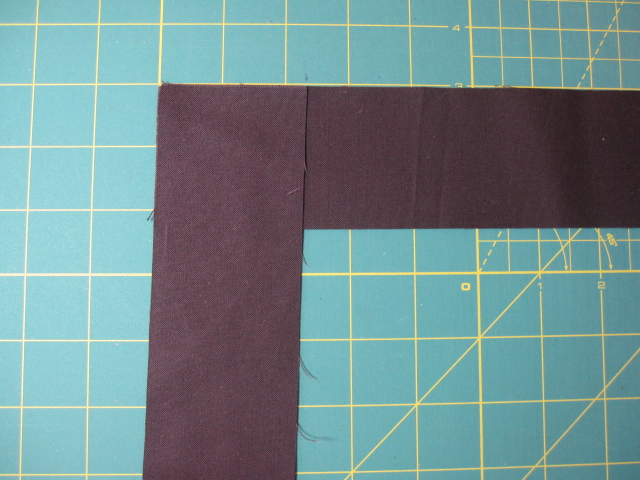
Place another strip face down (right sides facing) in the vertical position so that the corners match up.


Use your ruler and a pencil to mark a diagonal line from the bottom left to the top right of the overlapping fabric.


 Place a pin on each side of the mark, leaving enough room to sew your seam.


Sew along the marked line.


Repeat these steps until all the binding strips are joined together.

Use your ruler and rotary cutter to trim away all but 1/4" from each seam.


Press the seams open.


Finally, press the binding in half lengthwise, wrong sides facing.


Attaching the Binding
Now it's time to attach the binding to the quilt. Thread your machine with thread that matches the binding or something neutral. I'm using the same gray I used to do the free motion quilting. Attach your 1/4" piecing foot if you have one, otherwise, use the 1/4" measurement on your foot plate as your guide.

Tip: I simply love my "O" foot for my Janome. It's a 1/4" piecing foot and it has little markings at 1/4" before and after the needle. These markings are extremely helpful when sewing on binding as you'll see shortly. Don't have the same markings on your foot? You might want to consider marking these measurements with a Sharpie marker, or simply keep a ruler handy.

Starting at approximately the center of the bottom edge of the quilt, line up the raw edges of the binding against the right side of the quilt. Leave a tail of about 6-8" then start sewing on the binding using a 1/4" seam allowance. Reinforce your stitches when you start so they don't rip out as you're maneuvering around the quilt.

Leave a tail

Sewing on the binding

I use my right hand to guide the binding strip and my left hand to hold it all in place (gently!) so I don't have to pin anything.


Mitering the Corners
Stop sewing when you you're 1/4" from the edge of the quilt top edge. This is where I used the marking on my foot for a reference. I place a left fingertip on the spot where the quilt top ends underneath the binding and as soon as my thumbnail lines up with marking I stop sewing.

Stop sewing 1/4" from the edge of the quilt

 Backstitch to reinforce the seam then cut the threads.

Fold the binding up away from the quilt. The right edge of the binding should line up exactly with the right edge of the quilt.


Fold the binding back down so that the folded edge lines up perfectly with the top edge of the quilt.


Bring the folded end under the needle of your machine. Start sewing again 1/4" away from the top edge. Reinforce the seam.


For reference, your corners should look like this when you're done:

right side

left side

center view

Continue sewing the binding on and repeat the miter method on the other three corners.

Stop sewing about 8-10" away from the spot where you started sewing the binding down to the quilt. Reinforce your stitches then cut the threads. Leave a nice long tail of about 8-10" of binding.

Joining the Binding
The instructions below are what I consider to be the easiest way to join the binding ends. It's not the best, though, because it leaves a bumpy spot at the seam. It's best to join the ends on the diagonal like you did the other strips. There's a link to a YouTube video on this method at the end of this tutorial so don't feel obligated to use my method.


Somewhere near the middle of the open space between the two binding ends, butt the binding strips up against each other so that one end is flat and the other end is folded over.


Measure 1/4" from the fold.


Make a straight cut across at 1/4" from the fold (or slightly more, like 3/8"). You might expect to cut it 1/2" from the cut, leaving you with 1/4" seam allowance at both ends, but I find that the binding stretches out a bit as you sew this bit down, leaving you with some bunching at the end of the open section. Making the binding length a little shorter than the opening on the quilt remedies this problem.


Open up the pressed binding on each end. Line them up, right sides facing, and pin.


Sew a 1/4" seam across. You'll have to bend and maneuver the quilt a bit to get the binding under the sewing machine's needle.


Finger press the seam open.


With the seam open, fold the binding back in half. Line it up with the edge of the quilt. Sew the remaining stretch down using a 1/4" seam. Remember to reinforce the stitches at each end.


Check it out!


This is a good stopping point. In the last post of the series I'll cover hand sewing the binding to the back of the quilt.

Here's the Youtube video I promised earlier. I really like this method and plan to use it on my next quilt:


Thanks for sewing along with me. I'd love to hear your comments/questions if you have any.

-Annik